If you’re looking to make the most of your snowboarding season, there’s one essential task that needs completing before you hit the slopes: waxing your snowboard. Waxing your board with a good-quality wax helps keep it running smoothly and provides improved speed, control, and longevity as well as can protect from slush/ice build up on the base of a board. It also increases performance in either warmer or colder temperatures, depending on what type of wax is used. If this all sounds like something you want for yourself (and why wouldn’t it?), then read on for our guide on how to successfully and properly wax your snowboard!
How often should I wax my snowboard?
How often you should wax your snowboard depends on a number of factors, including the frequency of use, the type of snow conditions you’re riding in, and your personal preference.
In general, it’s recommended to wax your snowboard every 3–5 days of riding or before a big trip. This will help to keep the base of the board in good condition, allowing it to glide smoothly on the snow. Riding in wet snow or slushy conditions can accelerate the loss of wax, therefore it’s recommended to wax more frequently under those conditions.
Additionally, If you’re someone who rides frequently and in a variety of snow conditions, it’s a good idea to get into the habit of checking the wax on your board before each ride and reapply as needed. On the other hand, If you’re someone who only rides occasionally, it may be enough to wax your board once or twice a season, or before a big trip. If you are new to snowboarding, make sure to check out our article on the best snowboards for beginners of 2023.
Ultimately, the best way to determine how often to wax your snowboard is to pay attention to how it’s performing on the snow and make adjustments as needed.
Can I wax my snowboard myself?
Yes, it is possible to wax your snowboard yourself. With some basic equipment and knowledge, you can do it at home.
Here’s what you’ll need to get started:
- A wax iron
- A plastic scraper
- A brass brush
- A steel brush (optional)
- The appropriate type of wax for the current snow conditions and temperature range.
To make things a bit easier, there are basic tune and wax snowboarding kits available as well.
Step-by-Step Guide on Waxing your Snowboard
Here’s a step-by-step guide on how to wax your snowboard:
1. Clean the Base of the Board:
Cleaning the base of a snowboard is an important part of maintaining its performance and longevity. Here’s a general guideline for how to clean the base of a snowboard:
- Begin by removing any large chunks of dirt or debris from the base of the board using a stiff brush or a plastic scraper.
- Use a base cleaner or rubbing alcohol to clean the base of the board. You can apply the cleaner to a sponge or soft brush and gently scrub the base in a circular motion.
- Rinse the base thoroughly with water to remove any remaining cleaner or debris.
- Use a clean, dry cloth to dry the base of the board completely.
It’s also important to note that, while cleaning the base, you should also check for any scratches or damages. If you find any, you can fix them by using a P-Tex candle or a repair kit.
Also, do not use harsh detergents or cleaning solution, which can damage the base and the edges of the board. Regularly maintaining the snowboard base in good condition will help you to have a better ride every time and make it last longer.
2. Choose Appropriate Type of Wax:
Choosing the appropriate type of wax for your snowboard is an important step in maintaining its performance and prolonging its lifespan. Here are some factors to consider when choosing wax for your snowboard:
- Temperature Range: Different types of wax are formulated for different temperature ranges. For example, there are cold weather waxes that are best used in temperatures below freezing, and there are warm weather waxes that are best used in temperatures above freezing. Be sure to choose a wax that is appropriate for the current temperature range you’ll be riding in. There are all temperature waxes as well available for use.
- Snow Type: Different types of wax are also formulated for different types of snow. Some waxes are best used in dry, powdery snow, while others are better suited for wet, heavy snow. It’s important to consider the type of snow conditions you’ll be riding in and choose a way that is appropriate for that type of snow.
- Frequency of use: The more you use your board, the more frequently you will need to wax it. Some waxes are formulated to last longer than others, so you may want to consider how often you’ll be using your board when choosing a wax.
Ultimately, the best way to determine which type of wax to use is to experiment with different waxes and see which one works best for your specific needs and the type of riding you’ll be doing. You can also ask the professional tuner or the sport shop. They can guide you better according to your needs and the conditions you are going to ride.
3. Melt the wax:
Melting the wax for a snowboard is an important step in the waxing process. Put the wax on the iron, make sure to keep the iron on a steady surface to avoid any accidents. Different types of wax have different melting temperatures, be sure to consult the instructions on the wax package or the iron to set the right temperature. Once the iron is set to the appropriate temperature, use the iron to melt the wax. Hold the iron on top of the wax and move it around to ensure the wax melts evenly.
Remember to use heat-resistant gloves or a cloth to handle the iron and melted wax, as it can cause burns. It’s important to note that, overheating the wax can result in smoke and unpleasant smells, also some waxes can lose some of their properties if overheated, so be careful not to overheat the wax.
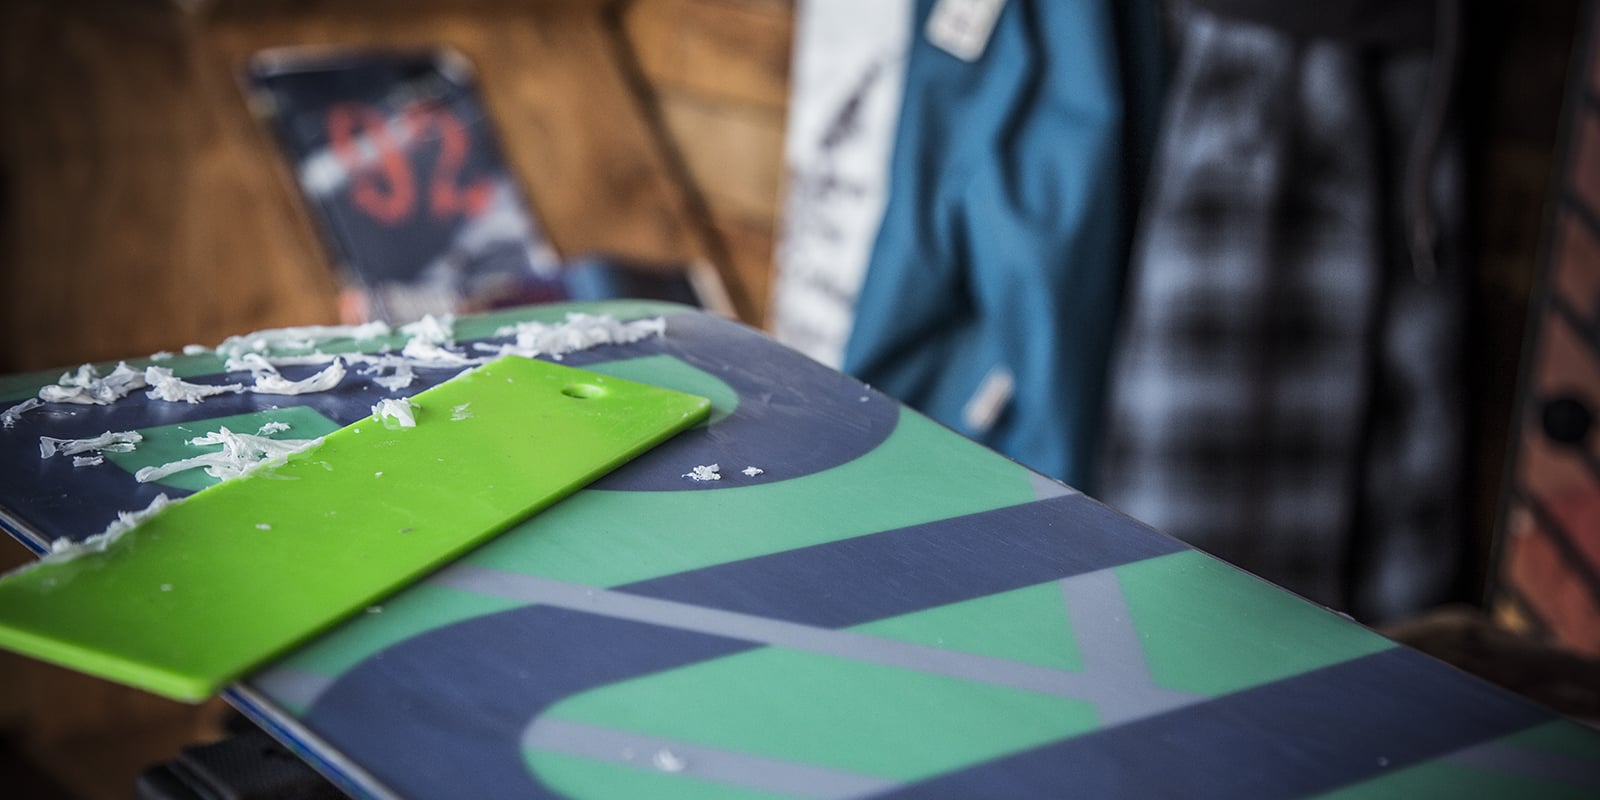
4. Spread the Wax:
Once the wax is melted and ready, use a plastic scraper to spread the wax evenly across the base of the board, making sure to cover the entire surface.
- Start from the tip of the board, and spread the wax towards the tail.
- Spread the wax with a consistent and even pressure.
- Once the entire base of the board is covered with a thin layer of wax, use the plastic scraper to remove any excess wax.
- Do not overload the board with wax as it can cause build-up and affect the glide of the board.
- Allow the wax to cool and harden: Wait for the wax to cool and harden, this usually takes around 15–20 minutes depending on the wax you are using and the ambient temperature.
- Scrape off the excess wax: Once the wax has cooled and hardened, use a plastic scraper to scrape off any excess wax.
5. Brush the Base:
Brushing the base of a snowboard after waxing. Here is an important step in the waxing process.
Here’s a general guideline for how to brush the base of a snowboard:
- Use a brass brush to brush the base in a circular motion, starting from the tip and moving towards the tail of the board.
- Brush the base with moderate pressure, making sure to cover the entire surface.
- Use the stiffer side of the brush to break up any wax build-up or unevenness.
- Use the softer side of the brush for a final polishing of the base.
- Repeat the brushing process several times, this will help to create a smooth surface and a better glide on snow.
- Make sure to remove any excess wax or debris from the base with a plastic scraper before brushing.
It’s important to note that, brushing the base after waxing will also help to distribute the wax more evenly and fill in any small scratches on the base, which can also help to prevent rust and corrosion on the edges. Brushing the base also helps to remove any impurities in the wax and create a smooth surface, which can improve the glide of the board.
Wrapping Up
Overall, waxing your snowboard is not as daunting a task as it may seem. Firstly, you need to ensure that the base of the board is clean to reduce any contamination before starting. From there you can decide which type of wax will work best for you weather and temperature wise, melt it and apply it evenly to the base for maximum performance on the slopes. Finally, brushing the base when finished will leave a smooth finish. Following these steps will also extend the life of your board significantly and have you looking like a pro coming down the mountain. All in all, with just a bit of preparation, skill and motivation, waxing your own board becomes an achievable endeavor. Do you feel comfortable waxing your snowboard? Get out there and ride safe!